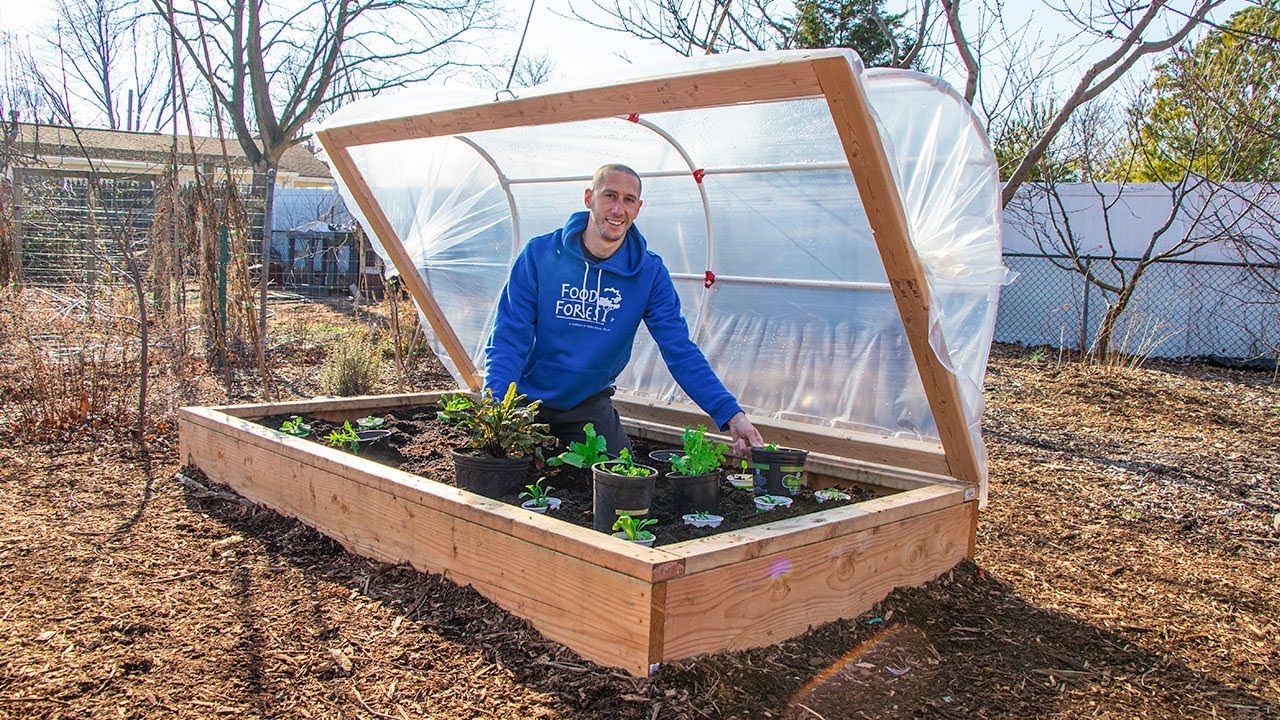
Today, you will learn how to build a hinged hoophouse for a raised bed garden from The Gardening Channel with James Prigioni. By following these simple steps, you will soon be enjoying fresh veggies from your garden all year round. The materials needed are easy to find and the instructions are clear, making this project both fun and rewarding.
With detailed guidance and support from James Prigioni, you can create your own DIY hinged hoophouse with ease. This project is a great way to enhance your gardening skills and ensure a bountiful harvest. Follow along and get ready to enjoy the fruits of your labor with a thriving garden in no time.
Materials Needed
To build a hinged hoophouse for your raised bed garden, you will need to gather the following materials:
2-in x 4-in x 8-ft Stud Douglas Fir X4
1/2-in x 10-ft 600 Schedule 40 PVC Pipe X6
3/4-in x 1/2-in x 90-Degree PVC Sch 40 Tee X6
1/2-in x PVC Sch 40 Cap X6
Furring strips 1 in. x 2 in. x 8 ft.
Pressure-Treated Board X4
1 and 1/4 in Deck Screws
3 and 1/2 in Deck Screws
Hinges X2
Stainless Steel Handle X1
Ensure you have all these materials ready before starting the construction process.
Setting Up the Raised Bed Garden
Before building the hinged hoophouse, it is essential to prepare the location for the raised bed garden. Clear the area, level the ground, and make sure it is suitable for gardening.
Construct the raised bed garden structure
Once the location is prepared, construct the raised bed garden structure using the pressure-treated boards. Make sure the dimensions are appropriate for the size of the hoophouse you plan to build.

Building the Hoophouse Frame
Attach the 2-in x 4-in x 8-ft studs for the base frame
Begin by attaching the 2-in x 4-in x 8-ft studs to form the base frame of your hoophouse. Position them according to the size of your raised bed garden.
Insert the PVC pipes and fittings for the hoophouse structure
Next, insert the 1/2-in x 10-ft PVC pipes into the 3/4-in x 1/2-in x 90-Degree PVC Sch 40 Tees to create the structure of the hoophouse. This will provide the frame for the cover.
Secure the frame with deck screws
Once the PVC pipes are in place, secure the frame by using 1 and 1/4 in deck screws for the base frame and 3 and 1/2 in deck screws for additional support.
Adding Hinges for the Hoophouse
Install the hinges for the hinged hoophouse
Attach the hinges to one side of the hoophouse frame to allow for easy opening and closing. Make sure they are properly aligned for smooth operation.
Ensure proper alignment for smooth opening and closing
Check that the hinges are aligned correctly and test the opening and closing mechanism to ensure smooth operation. Adjust if needed for optimal functionality.

Securing the Cover
Stretch the cover over the hoophouse frame
Carefully stretch the cover over the hoophouse frame, ensuring it fits snugly and covers the entire structure without any gaps.
Use clamps or fasteners to secure the cover in place
Secure the cover by using clamps or fasteners to keep it in place, especially during windy conditions. This will prevent the cover from shifting or coming loose.
Finishing Touches
Attach the stainless steel handle for easy opening
Install the stainless steel handle on the hoophouse door to make it easier to open and close. This will enhance the convenience of accessing your garden.
Adjust the height of the hoophouse as needed
Make any necessary height adjustments to the hoophouse to accommodate the growth of your plants. This flexibility will ensure that your garden thrives regardless of its size.

Maintenance and Care
Regularly check the condition of the hoophouse frame
Periodically inspect the hoophouse frame for any signs of wear, damage, or shifting. This will help maintain the integrity of the structure and prolong its lifespan.
Replace any damaged or worn-out components
If you notice any damaged or worn-out components, such as PVC pipes or fittings, replace them promptly to prevent further deterioration of the hoophouse.
Extending the Growing Season
Use the hinged hoophouse to extend the growing season
Take advantage of the hinged hoophouse to extend your growing season and enjoy fresh vegetables throughout the year. This will allow you to cultivate a wider variety of plants regardless of the weather conditions.
Enjoy fresh vegetables all year round
By utilizing the hinged hoophouse, you can harvest fresh vegetables even during the colder months. This continuous supply of homegrown produce will enrich your meals and promote a healthier lifestyle.

Engaging with the Gardening Community
Share your hinged hoophouse project on social media
Share the process of building and using your hinged hoophouse on social media to inspire and connect with fellow gardeners. You may also receive valuable feedback and insights from the gardening community.
Connect with other gardeners for tips and inspiration
Engage with other gardeners online or in local gardening groups to exchange ideas, tips, and experiences. This collaborative approach can enhance your gardening skills and broaden your knowledge of horticulture.
Conclusion
Building a hinged hoophouse for your raised bed garden is a practical and rewarding project that can significantly enhance your gardening experience. By following the steps outlined above and using the right materials, you can create a versatile structure that enables you to grow fresh vegetables year-round. Start constructing your hoophouse today and reap the benefits of a flourishing garden that thrives in any season. Happy gardening! ????????
