You have stumbled upon an exciting DIY project – building a wood greenhouse for under $1000. This article will detail the steps taken by C Moore Starts in constructing a new greenhouse to produce more starts for the upcoming Farmer’s Market. Get ready to learn how to create your very own greenhouse on a budget, following along with the video provided.
The wood greenhouse build is a perfect opportunity to expand your gardening capabilities without breaking the bank. By following C Moore Starts’ process, you can create a functional and beautiful structure to help your plants thrive. Stay tuned for a step-by-step guide on how to replicate this affordable and efficient greenhouse for your own gardening needs.

Choosing the Right Location
When choosing the location for your wood greenhouse, it is important to consider several factors to ensure optimal growth conditions for your plants. One crucial factor to consider is sunlight exposure. Make sure the location receives adequate sunlight throughout the day to promote healthy plant growth. Additionally, consider proximity to a water source for convenient watering, as well as access to electricity if you plan to install any lighting or heating systems. Lastly, ensure the ground is level to provide stability for your greenhouse structure.
Selecting Materials
Choosing the right materials for your wood greenhouse is essential for its durability and longevity. Opt for pressure-treated wood to protect against rot and insects, ensuring a longer lifespan for your greenhouse. Polycarbonate panels are excellent choices for insulation, as they help regulate temperature and retain heat, creating a suitable environment for plant growth. When it comes to fasteners, use galvanized screws to prevent rust and corrosion, ensuring the structural integrity of your greenhouse.
Designing the Layout
Before you start building your wood greenhouse, take the time to design the layout to maximize functionality and efficiency. Sketch out the dimensions of your greenhouse, including the size and placement of windows, doors, and any additional features you plan to include. Consider ventilation options to maintain proper airflow and temperature control within the greenhouse. Don’t forget to include shelves or storage space for organizing and displaying your plants and gardening supplies.
Building the Foundation
A solid foundation is crucial for the stability and structural integrity of your wood greenhouse. Start by digging post holes for the support beams, ensuring they are deep enough to provide adequate support for the structure. Next, pour concrete footings into the post holes to stabilize the foundation, preventing shifting or sinking over time. Once the concrete has set, level and secure the base frame to ensure a sturdy and level foundation for your greenhouse.

Constructing the Frame
Building the frame of your wood greenhouse is a critical step in the construction process. Begin by cutting and assembling the wood frame according to your design specifications, ensuring proper measurements and alignment. Attach the polycarbonate panels to the frame, securing them in place with appropriate fasteners. Add roof supports and bracing to reinforce the structure and provide additional stability against wind and weather conditions.
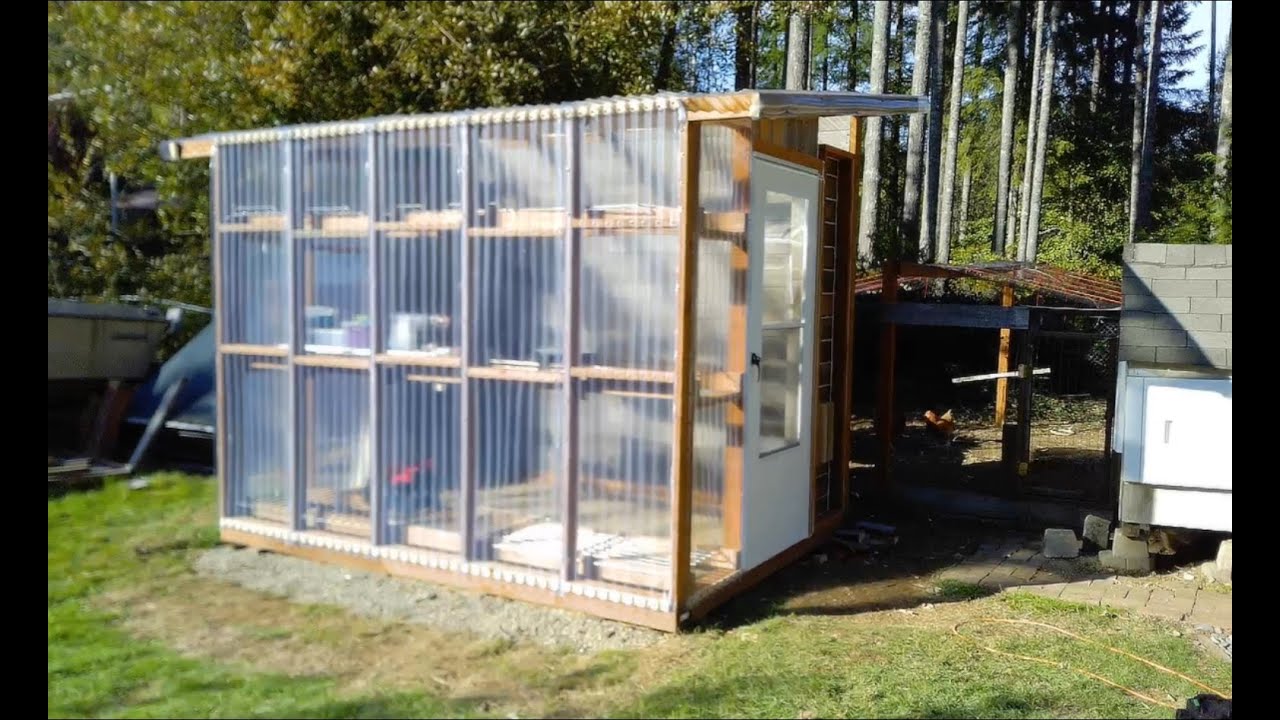
Installing the Covering
After constructing the frame, it’s time to install the covering for your wood greenhouse. Secure the polycarbonate panels to the frame, ensuring a tight fit to prevent air leaks and moisture infiltration. Seal any gaps or seams with caulk to create a weatherproof barrier that protects your plants from the elements. Install a secure door with hinges and a handle for easy access to your greenhouse, ensuring it remains a functional and inviting space for gardening.

Adding Ventilation
Proper ventilation is essential for maintaining a healthy environment inside your wood greenhouse. Install windows or vents to allow for airflow and prevent overheating during sunny days. Consider adding a fan to improve circulation and regulate temperature, especially during hot or humid weather. Insulate drafty areas to minimize heat loss and create a more thermally efficient greenhouse environment for your plants.
Interior Setup
When setting up the interior of your wood greenhouse, focus on creating a functional and organized space for your plants. Build shelves or benches for displaying and growing your plants, maximizing space and accessibility. Install a watering system to ensure your plants receive adequate moisture, whether through drip irrigation or a watering can. Include a thermometer and hygrometer to monitor temperature and humidity levels, providing valuable insight into the growing conditions inside your greenhouse.

Final Touches
To complete your wood greenhouse build, add some final touches to enhance its aesthetics and functionality. Consider painting or staining the wood frame to protect against weathering and add a touch of color to your greenhouse. Add decorative elements such as signs, planters, or hanging baskets to personalize the space and make it more inviting. Before you consider your greenhouse project complete, double-check that all components are securely installed and functional to ensure the longevity and success of your wood greenhouse.
Conclusion
In conclusion, with careful planning and construction, building a wood greenhouse under $1000 is achievable and can provide a sustainable space for growing plants year-round. By choosing the right location, materials, and design for your greenhouse, you can create an ideal environment for your plants to thrive. From laying the foundation to adding the finishing touches, each step in the construction process plays a crucial role in the success of your wood greenhouse project. With dedication and attention to detail, you can create a beautiful and functional space to grow a variety of plants and vegetables, all while staying within your budget. Happy gardening!
